Pharmaceutical sampling procedures for non-sterile products
- Kazi
- Last modified: March 14, 2025
Table of Contents
Importance of sampling in pharmaceutical industry
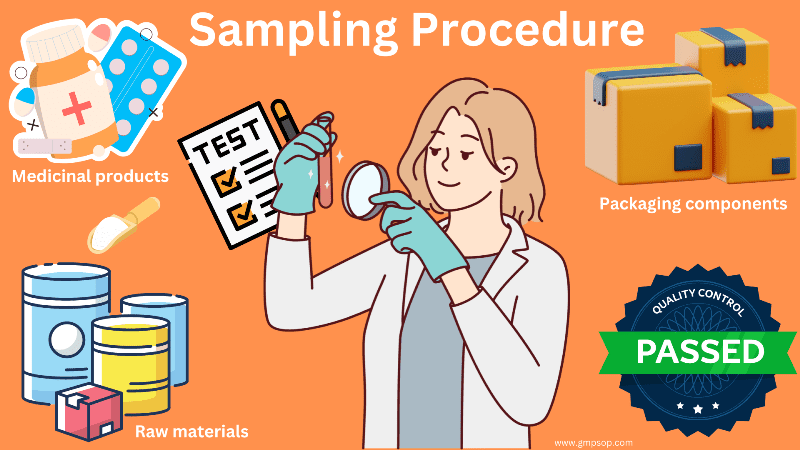
Pharmaceutical sampling procedures are carried out during and at each major processing step during manufacturing to ensure the highest quality.
Behind every safe and effective medicine lies the long and arduous hard work and passion of dedicated people at any pharmaceutical manufacturing facility.
Starting materials are processed, sampled, tested, packaged, and released before the finished products are stacked on pharmacy shelves.
Sampling and testing of raw materials confirm if the starting materials meet the specification and pass to allow for further processing.
Sampling is carried out on intermediate processed materials and tested to ensure they are formulated correctly, free from contamination, and qualified for filling and packaging.
Finished product samples are drowned from packed products to check if the labels are applied correctly and batch number and expiry dates are correct and legible.
All sampling and testing campaigns combined produce a degree of assurance that the pharmaceutical products are safe, pure, effective, and traceable for human consumption. Pharmaceutical sampling procedures play a vital role in that assurance.
This article will explore sampling procedures applicable to non-sterile pharmaceutical products, including different sampling plans, requirements, and techniques typically used.
This discussion will be useful for personnel responsible for sampling in the pharmaceutical industry.
Key Takeaways
- The sampling procedure includes techniques for sampling products and components at different processing stages in a manner that complies with cGMP regulations. The procedure dictates how to identify the container, sample quantity, tools required, sampling environment, and special precautions to be taken.
- Sampling and testing are carried out to ascertain product quality and the level of defects and identify any mix-ups, mislabelling, or contamination.
- Pharmaceutical manufacturers use several sampling plans to ensure their products' quality, purity, and efficacy. Some of those plans are acceptance, variable, composite, sequential, or random.
- Pharmaceutical sampling booths are enclosed and have controlled temperature, pressure, and relative humidity. Correct procedures must be followed inside the booth to ensure the effectiveness of the sampling.
- It is a GMP requirement to keep sampling records of all activities, such as commencement, completion cleaning, etc., in a logbook or register.
- The sampling of starting raw materials includes active pharmaceutical ingredients (API), critical excipients, and printed packaging materials such as cartons, labels, and leaflets.
- Where microbiological testing is required, sampling is carried out separately in sterilized containers using sterile equipment.
- Different sampling methods are used for raw materials from powder bags, barrels, granules or blends from drum or box, tank top, tank bottom, liquid jug, tablet or capsule form drum, end-of-run products, coated tablet and capsule, sampling of suspensions, etc.
- Re-sampling of a material is only permitted under certain circumstances: where the integrity of the original sample is doubted, an insufficient original sample is provided to complete the required testing, or Quality Assurance authorizes other special circumstances.
Cases where sampling failure can become very costly
Before you release pharmaceutical products for sale, it is important to check the medicinal products are filled into the right type of container (e.g., bottles, blister strips, aluminum foils, tubes, pouches, etc.). These are called primary packaging materials.
You will also check that printed labels are affixed to primary containers, display correct information (e.g., batch number and expiry date), and are registered with regulatory authorities.
Secondary packaging materials are used to house the primary containers and preserve pharmaceutical products from the external environment.
They are also required to be inspected to confirm GMP data and product claims are correct.
Pharmaceutical sampling procedures ensure all of the above.
Failure to match products with designated containers, printed labels, and secondary packaging material is likely to jeopardize the patient’s health.
This can result in costly recalls, loss of license to manufacture, loss of trust, loss of money, lawsuits, and other unpleasant things.
How does executing a sampling procedure correctly prevent you from such colossal losses?
I would like to bring your attention to the following scenarios, which demonstrate how quickly a system can fail due to minor negligence.
Quality assurance officers maintain sample registers that store the most recent versions of samples from each packaging category.
During inspection, the Officer keeps approved samples of printed labels, printed containers, etc., which are used as visual aids.
The Officer randomly collects samples from the production line and confirms that the units in the batch match the samples.
Now imagine if the Quality Officer didn’t know that recently, there was a major version update of the printed labels, and the Logistic Officer was unaware that new samples should have been provided to the Quality Officer, who would have replaced those in the registry.
As a consequence, the Quality Office can unwittingly approve an incorrect lot of older labels that can be issued to production.
The error could have been prevented if the logistics and quality officer had coordinated to update the samples in the register in real-time.
Human errors can also be made due to changes in raw material suppliers.
Pharmaceutical facilities must carry out tight sampling regimes for newly supplied material from new suppliers. Effective sampling procedures can facilitate the prevention of such failure.
Once the new raw material samples are proven to meet all required specifications several times, the company may gradually relax the sampling campaign based on the risk assessment.
Pharmaceutical sampling procedures and techniques should be designed to be realistic and fit for purpose.
A technique used for sampling from a blister packing line may not be realistic when applied to core tablet sampling from a drum.
In other cases, the sampling procedure can save parts of the batch affected by a failure.
For example, a sampling Officer carries special sampling tools suitable for drawing samples from the top, middle, and bottom sections of a drum.
Hence, in the event of a failure, the investigators can roughly identify at what point of the processing stage the quality has started to degrade.
250 SOPs, 197 GMP Manuals, 64 Templates, 30 Training modules, 167 Forms. Additional documents are included each month. All written and updated by GMP experts. Check out sample previews. Access to exclusive content for an affordable fee.
What is the procedure of sampling in pharmaceutical industry?
In pharmaceutical production, the sampling procedure is built around methods and techniques for sampling various components at different processing steps in a manner that complies with cGMP regulations and, where applicable, BAM (Bacteriological Analytical Methods) requirements.
As per PIC/S cGMP guideline clause 6.11, “The sampling should be done following approved written procedures that describe:
– The method of sampling
– The equipment to be used
– The amount of the sample to be taken
– The identification of containers sampled
– Any special precautions to be observed, especially concerning the sampling of sterile or noxious materials
– The storage conditions
– Instructions for the cleaning and storage of sampling equipment.
PIC/S cGMP clause also dictates that sample containers should bear a label indicating the contents, including the batch number, the date of sampling, and the containers from which samples have been drawn.
What are GMP sampling requirements?
According to FDA Clause 211.84(b), “Representative samples of each shipment of each lot shall be collected for testing or examination.”
“The number of containers to be sampled shall be based on appropriate criteria, such as statistical criteria, for component variability, confidence levels and degree of precision desired, and the supplier’s past quality history.”
According to PIC/S cGMP annex 8 – sampling of starting and packaging materials, “Sampling is an important operation in which only a small fraction of a batch is taken.
Valid conclusions cannot, on the whole, be based on tests carried out on non-representative samples. Correct sampling is thus an essential part of a system of quality assurance.”
Why is sampling important in the pharmaceutical industry?
We have talked about sampling, which involves removing a representative portion of a lot to assess whether the product composition, characteristics, and features are correct.
The purpose of testing samples is to infer the population from which the sample is drawn.
The direct benefits of sampling are:
– To determine the mean quality level
– To detect a certain level of defects
– To assess the level of heterogeneity
– To identify mix-ups, mislabelling, or contamination
– To verify the expected quality of the delivery
We assume or accept when sampling that:
– There is an agreed or implied inherent risk in our conclusions
– Defects are randomly distributed in the lot
– The production process is stable and continuous
250 SOPs, 197 GMP Manuals, 64 Templates, 30 Training modules, 167 Forms. Additional documents are included each month. All written and updated by GMP experts. Check out sample previews. Access to exclusive content for an affordable fee.
Important issues to consider during sampling
I think you should consider the following issues while the sampling procedure is carried out.
– Use only clean sampling equipment.
– Control the environment to prevent cross-contamination.
– Sampling should be reproducible: follow SOPs.
– Sample location should be defined, e.g., top, middle, or bottom
– Cross-section sample
– Sample should be taken from within
– Its original container or drum.
Types of sampling plans
Pharmaceutical manufacturers use several sampling plans to ensure their products’ quality, purity, and efficacy.
Here are some of the most common ones:
a. Acceptance Sampling Plan:
This plan involves taking samples from a lot or batch and testing them to determine whether the entire lot meets a specific set of criteria or specifications.
b. Attribute Sampling Plan:
This plan is used to test a product’s quality based on a specific attribute or characteristic, such as color, taste, or texture. It is used when the decision is Yes/No, Pass/Fail, or a count of the number of defectives.
c. Variable Sampling Plan:
This plan involves continuously measuring a product’s attributes and determining whether the product meets the desired level of quality based on those measurements.
It requires measurements, usually along a scale, with decisions based on the sample average and standard deviation.
d. Sequential Sampling Plan:
This plan involves taking samples in a specific sequence and determining whether to accept or reject the lot based on the results of each sample.
e. Stratified Sampling Plan:
This plan involves dividing a lot into subgroups or strata and taking samples from each group to ensure that the entire lot meets the desired quality level.
f. Random Sampling Plan:
This plan involves selecting samples randomly from a lot or batch to ensure that the samples are representative of the entire batch.
g. Systematic Sampling Plan:
This plan involves taking samples at regular intervals to ensure that the entire lot is consistently of high quality.
h. Composite samples plan:
This sampling plan specifies the maximum number of containers/drums/bags taken from a composite.
– The compositing of samples is applicable for microbiological testing, chemical analysis testing, retention samples, and re-test of raw materials.
– The container numbers used to create a composite sample must be recorded on the bottle of the composite sample so that it can be traced back to the container.
– The sample size of each composite sample is defined in the relevant raw material specification sheet.
250 SOPs, 197 GMP Manuals, 64 Templates, 30 Training modules, 167 Forms. Additional documents are included each month. All written and updated by GMP experts. Check out sample previews. Access to exclusive content for an affordable fee.
Tools required during the sampling
Collect the necessary clean and dry tools in place where the sampling process will take place.
A list of common tools is listed below:
– Knife
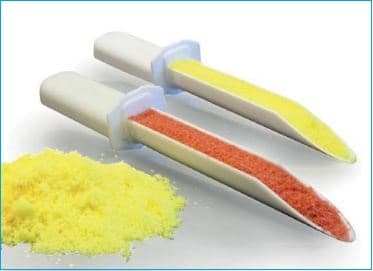
– Thief (scoop)
– Ethanol Alcohol
– Glass Amber Bottles and Caps (100 cc bottle)
– Sample Identification Label
– Sterile Bottles and Caps (as needed)
– Pipette Balls
– Disposable Pipette
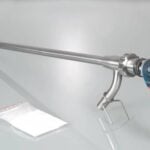
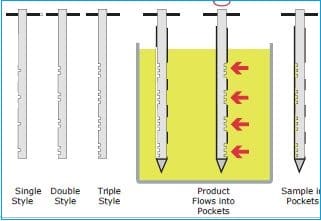
– Multicompartmental Thief
– Sampled by Tags or Stamp
– Plastic Bottles and Caps (60 cc bottle)
– Aseptic Sampling SOP # ___.
– Sterilization of Bottles and Caps, SOP #____
– Drum opener and spanner
– Clear packing tape
– 500mL natural high-density polyethylene wide-mouthed jar
– Top pan balance
– Stainless Steel Trolley
– Scissors
– Rubbish bin plus plastic hazard bags.
Design of pharmaceutical sampling booth

A pharmaceutical sampling booth, also known as a cleanroom sampling booth, is an enclosed area used to safely and sterilely handle pharmaceutical products, raw materials, and equipment.
It is designed to provide a controlled environment that prevents contamination of the samples during the sampling process.
i. Ensure the following conditions exist at the various gauges in the sampling booth before commencing any sampling:
– Airflow gauge (at sampling booth panel) operates between 60-105 Pascals.
– Fine dust filter gauge (at sampling booth panel) operates between 0-250 Pascals.
– Temperature within the sampling room is below 250C (displayed on the sampling booth panel).
– Relative Humidity (displayed at sampling booth panel) reads less than 40%.
– The pressure gauge on the wall just past the door of the sampling booth (inside the sampling booth) reads a minimum of 10 Pascals.
ii. Inside the sampling booth, always follow the correct procedure to ensure the effectiveness of sampling.
iii. Sample always carefully so that dust is not generated.
iv. Stand sideways, facing the stainless steel panel, to ensure that airflow is correct and powder/dust is pulled into the booth.
v. Always sample at hip height and avoid bending over the containers while sampling.
vi. Draw aseptic samples first, then draw chemical samples using sampling in approved containers
vii. Vacuum all spills with the dedicated vacuum cleaner provided and wipe pallets clean with alcohol if necessary before removing them from the sampling booth.
Then, vacuum the sampling booth floor and wipe surfaces free of powder. Dispose of all cleaning cloths in dedicated waste bins.
viii. Record all activities such as commencing, completion of sampling and cleaning in the equipment and module logbook.
250 SOPs, 197 GMP Manuals, 64 Templates, 30 Training modules, 167 Forms. Additional documents are included each month. All written and updated by GMP experts. Check out sample previews. Access to exclusive content for an affordable fee.
Sampling requirements for starting materials
The identity of a complete batch of starting material can normally only be ensured if individual samples are taken from all the containers and an identity test is performed on each sample.
Sometimes, it is permissible to sample only a proportion of the containers where a validation procedure has been established to ensure that no single container of starting material will be incorrectly identified on its label.
a. Sampling requirement for critical and non-critical excipients
Critical excipients are raw materials that are defined as those directly added to final product formulation, whose function is as an adjuvant, preservative, or antioxidant.
Non-critical excipients are also raw materials that are directly added to the final product formulation and whose function is not that of an adjuvant, preservative, or antioxidant (e.g., diluents, buffers, solubilizers, vehicles, etc.).
These raw materials must be sampled and tested in one or composite containers.
Use the method as follows:
– Perform identification from one container per batch per shipment.
– If microbiology samples are required, prepare a composite sample of all containers per batch.
– Perform chemical analysis from the composite sample of containers per batch.
– Check the compliance of the manufacturer’s certificate of analysis against the raw material specification.
– Take retention sample from composite prepared.
b. Sampling requirement for active (API) raw materials
Active raw materials are directly added to the final product formulation and classified as therapeutic agents.
The GMP requirement for identity testing is to sample and test every container unless the supplier is validated.
If you are sampling for potency determination, some of the samples (but no more than 5) can be pooled. A sample plan may be used as well.
There should be no difference in sampling plans between actives and excipients. Major disasters have occurred due to excipient and active mix-ups.
Remember, generally, excipients are present in greater quantities in the product.
If critical material is used in the preparation of an injectable product, for example, a reduced sampling plan is unlikely to be reliable.
Active raw materials are to be sampled and tested from all containers. Use the method as follows:
– Perform identification from all containers per batch per shipment.
– If microbiology samples are required, prepare a composite sample of all containers per batch.
– Perform chemical analysis from each container per batch (for oral and topical applications).
– Check the compliance of the manufacturer’s certificate of analysis against the raw material specification.
– Take retention samples from composite prepared from each container per batch.
c. Sampling requirement for packaging materials
The sampling procedure for packaging materials should take into account at least the following:
– The quantity received
– The quantity required
– The nature of the material
– The production methods
– The knowledge of the quality assurance system of the packaging materials manufacturer based on
d. Sampling for microbiological testing
Materials requiring microbiological testing shall be defined in the relevant material specification file.
Microbiological testing will be done before any chemical or physical analysis of samples.
– For microbiological sampling, use sterile gloves and a mask during sampling.
– Only use sterile disposable equipment (e.g., sterile pipettes/syringes and spatulas) to transfer the sample into sterile sampling containers.
250 SOPs, 197 GMP Manuals, 64 Templates, 30 Training modules, 167 Forms. Additional documents are included each month. All written and updated by GMP experts. Check out sample previews. Access to exclusive content for an affordable fee.
What sampling techniques are used in pharmaceutical industry?
a. General technique
Determine the number of samples to be taken using military standard 105, Level I, or as specifically directed by the quality team.
Obtain container/s of appropriate size, type, and quantity from regular stock supply to hold the desired amount of samples (3/4 full).
Label each container with the following information:
– Item name
– Item potency
– Lot #
– Date sampled
– Sampler initials
– Machine #/Container # or sample port where applicable.
– Label the point of the sample (e.g., top, middle, bottom, left, right, etc.) when applicable.
– Running weight where applicable
– Vendor identification where applicable
– Proceeds with sampling specific to the component type.
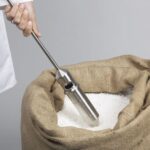
b. Sampling procedure of raw material from powder bag
– Disinfect the knife blade and thief to be used in sampling with ethanol and clean cloth before each lot is sampled and at each component changeover.
– Please ensure that the surrounding area where sampling will be taken is clean.
– Using the disinfected knife, make a small V-shaped cut in the bag, with the point of the V in the top position.
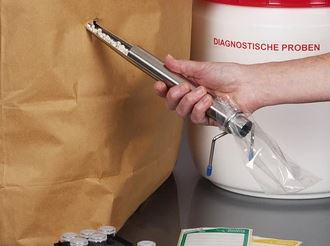
– Insert thief (scoop) in V-Cut on the bag at 90º angle and withdraw the sample.
– Place the sample in the sample bottle and close the bottle securely (amber glass bottles with metal caps).
– Seal cut in Raw Material Bag completely using tape.
– Apply the “Sampled By” label or stamp to the bag where the sample was taken.
– Clean all spillage caused by sampling.
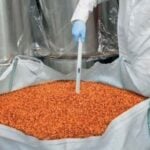
c. Sampling of granules or blend from drum or box
– Cut off the tamper-resistant seal and remove the lid.
– Label each sample container with the following information: item code, product name, batch number, sample position, signature and date
– Disinfect the thief with alcohol before each individual lot is sampled and at each component changeover.
– Open liner in Drum.
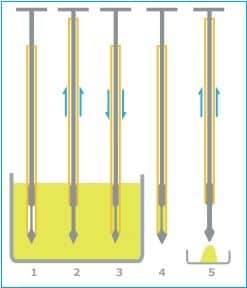
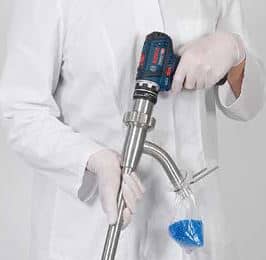
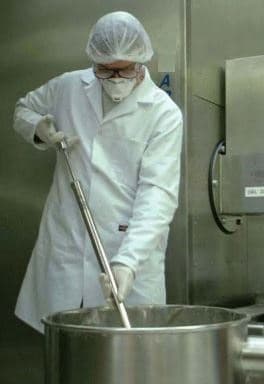
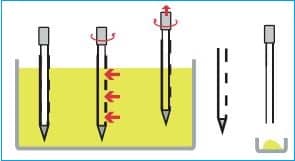
– Obtain a sample from the drum by:
i. Insert a multi-compartmental thief into the drum at a 45º angle and withdraw the sample from the top, middle, and bottom.
ii. Insert the thief (scoop) into the drum at a 45º angle and withdraw the sample only from the top.
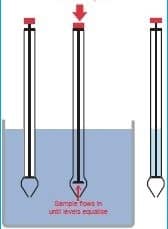
– Ensure the plunger of the sampling thief is fully down before inserting it into the blend at the required position in the blender and to the required depth.
– Holding the thief’s body at the same depth in the blend, pull the plunger up to draw some blend into the thief.
– Withdraw the thief from the blend, and while holding the thief over the sample container, press the plunger down to fill the container with the sample.
– Please ensure the sample container is filled to the brim before closing the container with the lid.
– After filling the sample container, move the plunger up and down over the blender to remove as much excess blend material as possible before taking the next sample.
– Place the sample in the sample bottle and close the sample bottle securely.
i. Raw materials in amber glass bottles with metal caps.
ii. Granulation blends in plastic bottles with plastic caps.
– Reseal liner.
– Replace the lid on the drum and apply a tamper-resistant seal when applicable.
– Apply the “Sampled By” label or stamp to the drum or box where the sample was taken.
– Apply an orange dot in the granulation area instead of the “Sampled By” label or stamp.
– Clean all spillage caused by sampling.



250 SOPs, 197 GMP Manuals, 64 Templates, 30 Training modules, 167 Forms. Additional documents are included each month. All written and updated by GMP experts. Check out sample previews. Access to exclusive content for an affordable fee.
d. Sampling procedure of raw material from barrels
– Remove the cap from the barrel.
– Remove the cover from the disposable pipette utilizing new pipettes between lots and at the component changeover.
– Apply pipette ball to end not inserted into the sample.
– Insert pipette into solution. Squeeze and release the pipette ball, taking care not to get liquid inside the ball.
– Release liquid from pipette into sample bottle (amber glass).
– Cap bottle securely (metal cap).
– Replace the cap on the barrel.
– Apply the “Sampled by” label or stamp to the barrel where the sample was taken.
e. In-process raw material sampling procedure from the liquid tank
i. Tank Top Sampling Method
– Remove the cover from the tank top.
– Remove the cover from the disposable pipette utilizing new pipettes between lots and at the component changeover.
– Apply pipette ball to end not inserted into the sample.
– Insert pipette into solution. Squeeze and release the pipette ball, taking care not to get liquid inside the ball.
– Release liquid from the pipette into the sample bottle.
– Cap bottle securely (amber glass bottle with metal cap).
– Apply the “Sampled By” label or stamp to the tank where the sample was taken.
ii. Tank Bottom Sampling Method
– Open the valve and flush approximately two (2) gallons of material into an approved container.
– Return material flush to tank top.
– Obtain a sample from the valve placed in a sterile bottle.
– Cap bottle securely (amber glass bottle with metal cap).
– Apply the “Sampled By” label or stamp to the tank where the sample was taken.
f. Sampling of raw material from liquid jug
– Remove the cap from the jug.
– Pour the sample into a sample bottle (amber glass bottle).
– Cap sample bottle securely (metal cap).
– Replace the cap on the jug.
– Apply the “Sampled By” label or stamp or jug where the sample was taken.
g. Sampling procedure of tablet or capsule from drum
– Remove the lid from the drum and open the liner.
– Apply clean gloves, changing them before each lot is sampled and at each component changeover.
– Obtain samples from the top, middle, and bottom of the drum with a gloved hand and place them in the appropriate container(s) (plastic bottle with plastic cap).
– Reseal liner.
– Replace the lid on the drum.
– Apply a “Sampled By” label or stamp to the drum where the sample was taken. In the Compression/Encapsulation area, apply a red dot in place of the “Sampled By” tag or label.
h. Sampling of end-of-run tablets and capsules
The tablet and capsule sample size depends on the batch size and is determined according to ISO 2859 Acceptable Quality Limit (AQL).
A Sample equivalent to a Level II General Inspection is taken across the batch.
– If the batch size is between 35,000 to 150,000 – the sample size will be 500.
– If the batch size is between 150,000 to 500,000 – the sample size will be 800.
– If the batch size exceeds 500,001, the sample size will be 1,250.
i. Collect equal tablets or capsules from each bucket to form a representative end-of-run sample.
ii. Calculate the number required from each bucket by dividing the total sample size (500, 800, or 1,250) by the number of buckets required for the job.
iii. Determine the net bucket weight for tablets (for example, 12kg). The net bucket weight for capsules is (for example, 9kg).
iv. For example, for a lot size of 416,667 tablets, multiply 416,667 by the fill weight to calculate the product’s weight to be produced.
This number then needs to be divided by 1,000,000 to convert milligrams to Kilograms.
Weight of tablets = 416,667 Tabs x 480 mg/Tab ÷ 1,000,000 – 200 kg.
Now divide the weight of the tablets by the net bucket weight
No. of buckets = 200kg ÷ 12 kg = 16.7 = 17 buckets.
The sample size is 800. Therefore, 800 ÷ 17 = 47 tablets per bucket.
v. Collect the tablets or capsules in a plastic bag. The bag should be labeled with the item number, product name, lot number, date, average weight (as determined during in-process testing), signature, and date and marked “End-of-run.”
vi. The samples are delivered to the Quality Control Laboratory for testing.
i. Sampling of coated tablet and capsule
While the coating pan continually mixes the tablets, a representative sample is taken by transferring small scoops from the coating pan as the tablets are mixed during the coating’s cooling-down process.
– Approximately 100 grams are collected in a labeled plastic bag.
– The plastic bag is labeled with the item number, product name, lot number, date, average weight (as determined during in-process testing), signature, and date and marked “coated.”
– The samples are delivered to the Quality Control Laboratory for testing.
j. Liquid sampling of suspensions
– Sampling is accomplished with a spoon that has been previously cleaned.
-The suspension product should be thoroughly mixed before sampling.
– The sample process is undertaken immediately after cessation of stirring.
– The operator collects a sample as instructed in the manufacturing instructions.
– Label each sample container with the following information: item code, product name, batch number, sample position, signature, and date.
– Where a sample from the bottom is required, it is taken from the outlet valve at the bottom of the mixing vessel. Approximately 200ml is flushed through the valve before the sample is taken.
– The lid is placed on the sample container immediately after the sampling. The sample is then covered with aluminum foil (as the suspension is light-sensitive) and transferred to the QC Laboratory as soon as possible.
– The sampling tools used should be cleaned immediately after the sampling.
k. Tablet press sampling procedure
– Apply clean gloves before sampling and at each product or lot # change.
– Obtain a sample from the press at the point of exit as it is running.
NOTE: Never put your hand or any other object in the press while it is running.
l. Deionized water sampling
– Select the water port (s) or fixtures and open them to the wide-open setting, letting the water run to waste for 1-2 minutes.
– Select a sterilized bottle; refer to SOP #_____ for methodology.
– Remove the lid from the sterile bottle and quickly interrupt the stream of water to fill the bottle with at least 150 ML of water.
– Cap the bottle tightly.
– Turn off the relief valve.
m. Sampling of 70% alcohol
– Collect the following tools for 70% alcohol sampling:
i. 500mL x 5 sterilized jars (for microbiological testing)
ii. 120mL x 1 non-sterilized jar (for chemical testing)
iii. 1 sampling thief – sterilized
iv. 70% alcohol
v. Latex gloves
vi. Texta for labeling
– Ensure correct gowning procedures are followed for entry into the manufacturing area.
– Ensure latex gloves are sprayed with 70% Alcohol are worn before sampling.
– Label all sample jars with the sample name, batch number, date and time sampled, and the operator name using the labeling marker.
– Spray the drum cap with 70% Alcohol and remove it.
– Remove the sampling thief from the sterilization bag and plunge it into the drum, ensuring the plunger of the sampling thief is down and submerged under the liquid so it fills.
– Gently remove the sampling thief, pull it up, and expel the liquid into the sample jars. Repeat this process until all sample jars are full.
– Tighten the lids of the sample jars to prevent leaking, take the samples to the QC Laboratory, and affix proper labels to the sample jars.
– Send the microbiological samples to the Microbiology Lab for microbiological testing.
n. Packaged product sampling (retain samples)
NOTE: The quantity and labeling of packaged products are the exceptions to the guidelines under the heading General.
– All samples will be labeled with the product’s finished product label.
– All liquid samples will also be identified with a sample label.
– All work orders are to be sampled at the following rates:
– All solid dosages require one bottle (regardless of count) from the beginning and one bottle from the end of filling. Verify that enough samples exist to perform adequate tests as needed.
– Liquid filling and packaging work orders require two bottles from the beginning of the filling operation, two bottles from the end, and one retention sample from each work order per lot (a retention sample can be taken from any point).
Re-sampling procedure
Where a raw material, blend, end-of-run, coated, or bulk requires re-sampling, the sampling steps are the same as those described above for the original sample.
Re-sampling of a material is only permitted under certain circumstances, such as doubting the integrity of the original sample, providing insufficient original sample to complete the required testing, or other special circumstances authorized by the Quality Manager.
A “Request for non-routine sampling” form must be completed for each re-sampling event.
The form must detail the specifics of the re-sampling event, including the number and size of samples to be taken.
Note where samples will be drawn (original containers or new locations).
Please be aware of what testing will be conducted before the samples are delivered to the quality control laboratory.
250 SOPs, 197 GMP Manuals, 64 Templates, 30 Training modules, 167 Forms. Additional documents are included each month. All written and updated by GMP experts. Check out sample previews. Access to exclusive content for an affordable fee.
Sample distribution and coordination
To maintain the accuracy and traceability of the sample, all sampling, distribution, and coordination activities must be documented in real time by the responsible personnel, with lot number, date, and time stamping.
Take the following steps during sample distribution:
– Submit samples taken for regular analysis to the QC lab.
– Log into the appropriate book for the samples being submitted.
– In-Process Samples Log Book
– Raw Material/Component Samples Log Book
– Finished Product Samples Log Book
– Validation Samples Log Book
– Place Samples in the appropriate place in the lab.
Defining acceptable quality level (% AQL) in sampling procedure
The acceptable quality limit (%AQL) is defined as the maximum percent defective, which, for the purposes of sampling inspection, can be considered satisfactory as a process average and corresponds to a relatively high probability of acceptance. (ISO 2859-10:2006)
In other words, AQL represents the level of defects in a lot that we are prepared to accept. The probability of acceptance is higher for large sample sizes. AQL applies to both attributes and variables.
AQL is not designed to protect the consumer for specific lots but relates more to a series of lots.
Attribute sample plans are arranged so that a batch with a defect level equal to the AQL is highly likely to be accepted (90-99%).
On the other hand, the plans are arranged so that batches with a defect level greater than the AQL have a rapidly decreasing probability of acceptance.
Could you decide what AQL you are looking for when using a sampling plan?
Use the following as an AQL guide:
– 0.1% AQL: critical defect
– 0.1-1.0% AQL: major defect
– 1.0-4.0% AQL: minor defect
Examples of some typical acceptable quality levels in sampling
Here are some typical AQLs for in-process testing of tablets:
i. Unacceptable level AQL < 0.001%
– Foreign tablet
ii. Critical level AQL 0.065%
– Broken tablet, split tablet, or chipped tablet
– Exceeds the Pharmacopoeia Weigh uniformity tests
– Foreign matter in tablet
– Wrong color
– Grainy surface finish
– No logo or line
iii. Major level AQL 0.4%
– Chipped tablet 2% • 4%
– Poor engraving
– Small color variation
– Surface finish with small grain
– Dirty or spotted tablet
iv. Minor level AQL 1.5%
– Tiny chips or tiny spots
Conclusion
The sampling procedure plays a crucial role in ensuring the safety and quality of pharmaceutical products.
In this article, we explored some sampling techniques commonly used for non-sterile pharmaceutical products.
Sampling in pharmaceutical production requires a plan that outlines the objective of sampling, the tools and techniques to apply, the number and frequency of sampling, acceptable quality limits, environmental control, housekeeping, employee training, record keeping, etc., among many other things.
Pharmaceutical sampling procedures should also dictate specific requirements for sampling raw material and blends from powder bags, drums, liquid barrels, tanks, jugs, etc.
The procedure should also detail tablet and capsule sampling before and after packaging.
The procedures should detail how to document the sampling and distribution activities typically required for pharmaceutical products.
It is also important to define the acceptable quality limits in the sampling procedure and material specification to facilitate the tester making an informed decision to accept or reject a batch.
Authorized agencies typically regulate sampling techniques to meet specific standards and guidelines.
This helps to protect public health and ensure that pharmaceutical products are safe, pure, effective, and capable of meeting the expected quality.

Author: Kazi Hasan
Kazi is a seasoned pharmaceutical industry professional with over 20 years of experience specializing in production operations, quality management, and process validation.
Kazi has worked with several global pharmaceutical companies to streamline production processes, ensure product quality, and validate operations complying with international regulatory standards and best practices.
Kazi holds several pharmaceutical industry certifications including post-graduate degrees in Engineering Management and Business Administration.
